Cairns Day Trips
There are so many things to do locally. You can spend a day or a whole week around town. From good food to go-carts. There is something for everyone in Cairns. Book accommodation and stay a while!
Call 4WD Hire Cairns for expert advice, enquiries, quotes, and bookings 07 4051 1120
Hire from Cairns, Broome, Darwin, Perth, Alice Springs, Yulara and k’gari
Call 4WD Hire Cairns for expert advice, enquiries, quotes, and bookings 07 4051 1120
Hire from Cairns, Broome, Darwin, Perth, Alice Springs, Yulara and k’gari

There is risk with a vehicle water crossing. The general rule is if you do not have to go through water – then don’t.
When planning your trip make sure you allow extra time in case your return takes a little longer than planned. Book a night’s accommodation in Cairns before and after your trip to allow time to get supplies and start out fresh and return the vehicle clean, before you have to jump on that plane.
A little water in the engine electronics can mean and sleepover in the bush or an expensive repair. Water crossing often means you get to go to isolated and pristine locations that make the risk worth the reward. If you are going to do a water crossing you need to know some basics:
Tyre Pressure
Tyre pressure is critical for a whole bunch of reasons. Most successful off-roading is about running the right tyre pressures for the terrain, and water crossings are no different. A longer and wider tread from airing down equals more grip. And on a slippery, round, river-rock bottom, it can be the difference between getting through or getting stuck.
At the water crossing, the important thing is to check the bottom strata of the river. If it is sand or mud, go lower with your tyre pressures of 16-23psi. Rocks can be slippery and may require something in the high-teens to low-20s and a firm packed base should be manageable with higher pressures.
Minimise the chance of getting stuck
Check your surroundings, including what is at the bottom of the crossing. If possible, get out of your car and walk the crossing. Take note of any submerged objects such as rocks, logs and deep drop-offs. Make a note of the depth and the water flow.
If the water is too deep, your car may float away. Try to pick the shallowest, not the deepest part of the river, with the easiest terrain. If you are unable to walk the track using a dead branch can assist in calculating depths along the crossing and the height of the ridge in between tracks.
If you cannot get a good idea of the crossing conditions, reconsider your need to take on the crossing. It’s probably too dangerous. Now check everything, and check again.
Recovery Gear
Have your recovery gear ready – if you need it you will need to move quickly to minimise damage. The basics include snatch straps or a tow rope. Make sure you know where the recovery anchor point is before you need it and use this to secure recovery gear for your vehicle.
Always consider the entry, the crossing, and the exit point. Assess whether your vehicle can make all three. Check the entry and departure angles. Remove anything in the access in or out of the crossing.
Don’t rush your water crossing, you may want to let the vehicle cool down before starting to cross the water. It’s a good idea to know where the vehicle draws air from, so you can make sure the water level is below this point, if you do not have a snorkel.
Crossing
Time to cross! If your vehicle is manual, do not change gears halfway through the crossing. In automatic vehicles, you can manually select a gear. Your aim is to achieve a steady pace through the water without the fear of a mid-stream gear change slowing your progress. It is also useful to use low range in water crossings. First or second gear will often be best. Under no circumstances should you stop during the crossing, if you can help it.
You want to drop the front of the car into the water and maintain a steady pace, which will create a bow wave in front of the vehicle, pushing water ahead and away from the critical parts of the car. If you drive in like a hoon, it will look great with water spraying in every direction, but it will also likely result in damage to the vehicle. Slow and steady is the key; the bow wave in front of the vehicle works to clear water directly in front of the vehicle so you can follow it through.
Once through the other side, make sure you give your brakes time to dry out. If you keep driving, gently using your breaks they will dry out. If you are stopping on the other side leave the car running for a while before shutting everything off so it has time to dry out.
The best option – talk to the expert team at 4WD Hire Cairns to book the correct vehicle for your trip. Check out our Your Cape York Travel Guide.
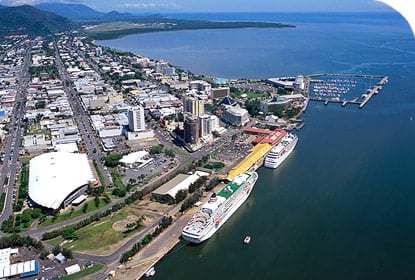
There are so many things to do locally. You can spend a day or a whole week around town. From good food to go-carts. There is something for everyone in Cairns. Book accommodation and stay a while!

Surrounded by the world’s oldest living tropical rainforest, the colorful village of Kuranda is known as the Village in the Rainforest. Just 25km northwest of Cairns.

The Daintree covers 1200 sq km between the Mossman Gorge and Bloomfield River. Cape Tribulation is where the Wet Tropics Rainforest and the Great Barrier Reef meet.
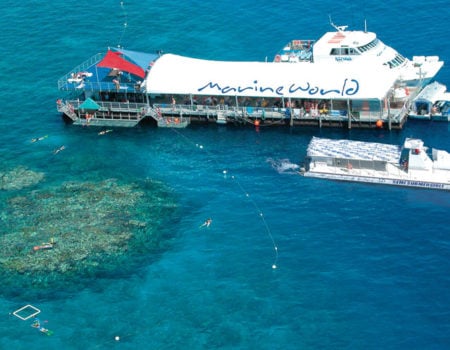
Visiting the Reef includes: snorkelling, scuba diving, aircraft or helicopter tours, glass-bottomed boats, semi-submersibles and educational trips, cruise ship tours, whale watching and swimming with dolphins.
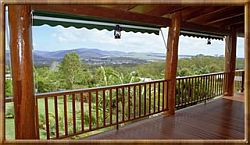
Located just south of Cairns, the cooler-climate of the Atherton Tablelands has variety of landscapes and attractions – waterfalls, national parks and coffee plantations. Markets, food and wine.

The ultimate self-drive location – Cape York. You will find more 4WDs here than anywhere else in the country. A 1200km strip of road connects Cairns with Cape York allow at least 7 days to take the drive.